
Warthog Pump Owner’s Manual
Rugged, Reliable and Ready
Download the full manual
Warthog Products International Inc. — Regina, Saskatchewan, Canada

Read the complete manual below
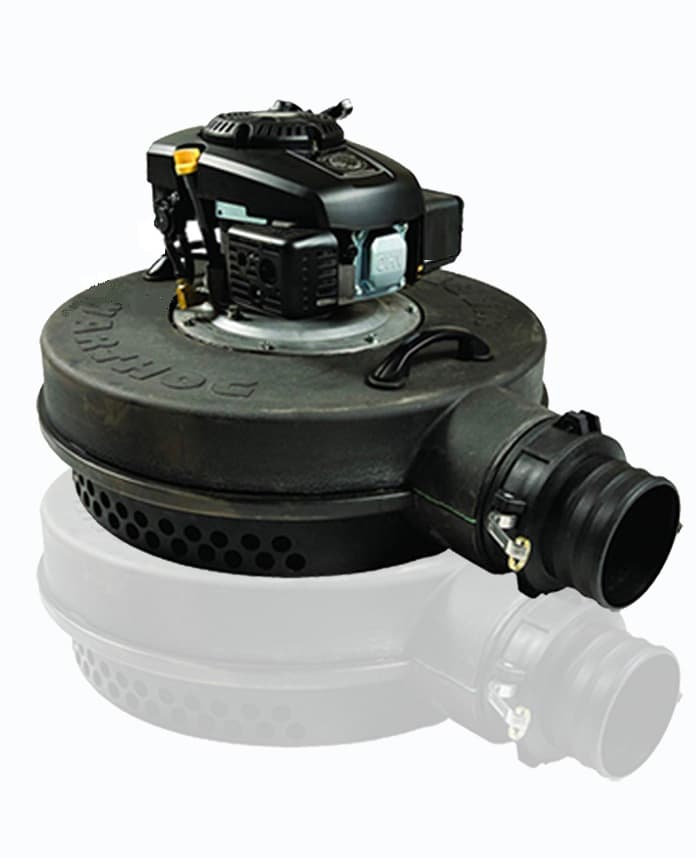
Like mother nature’s creation, tough, reliable and comfortable in water and sludge.
Manufactured by: Warthog Products International Inc.
Regina, Saskatchewan, Canada
Your WARTHOG PUMP must be shipped dry — WITHOUT engine or gear case oil.
CAUTION: Do not start the engine until oil is added to the engine AND gear case. Read this manual and the engine owner’s manual carefully before operating your WARTHOG PUMP.
Before Starting the Warthog Pump
Engine — Refer to the engine owner’s manual for minimum engine oil requirements and fuel requirements. Also refer to the engine owner’s manual for oil change requirements, engine service requirements, engine starting instructions and use of the manual choke.
Gear Case — The gear case in your WARTHOG PUMP requires 1 litre (35 ounces) of GEAR OIL. Remove the gear case oil plug. Then fill the gear case with the recommended amount of oil and replace and tighten the oil plug. Fill only to a level that is 35–40mm from the top of the oil fill plug opening.
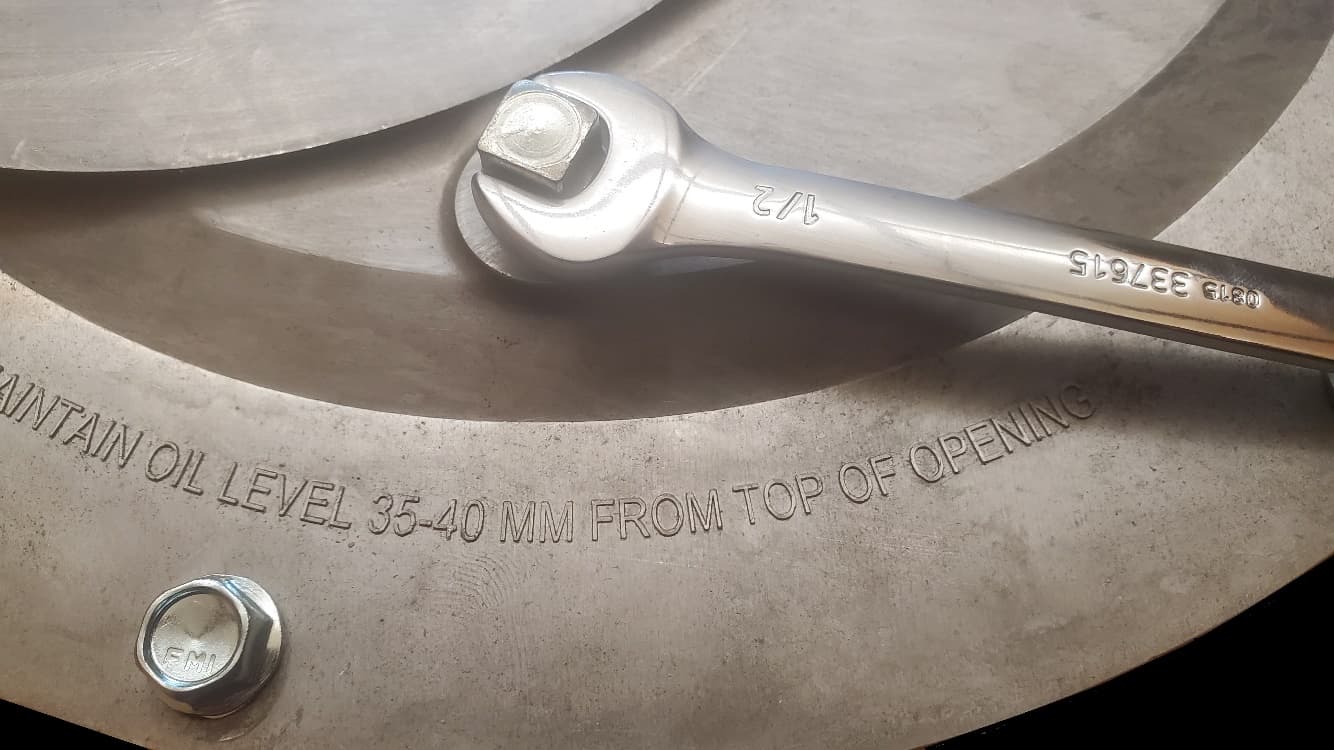
Gear case oil fill level, engraved on the pump housing
Engine / Pump Start-Up Recommendations
Prior to pumping, start the engine on dry land and run for two minutes to ensure easier starting once it is placed on the water. Ensure to pull the engine start cord just as the pump is shutting off when it has run dry.
Ensure the hose does not have a twist in it before starting the engine to begin pumping. Run the pump at full throttle — your WARTHOG PUMP is engineered to run at full throttle.
Fluid Level Checks
Check the gear case oil level every 24 hours and/or before every use, and add if required. Check the engine oil level before every use and add if required.
Breaking In Your Pump & Starting on Land
When running your pump on land: when you shut it off you must pull the engine cord just as it stops turning, so the impeller can cool and not weld itself to the housing.
The impeller is designed to rub against the housing, and when you first start it there will be a smell and some plastic debris will come from the discharge. This will ensure your pump has the best flow and lift possible, as the impeller will burn itself exactly into the perfect position. However, when it runs dry this friction causes the plastic to heat up, and when the pump stops the impeller will stick — or may stick — to the housing if you do not pull the engine over a couple of times just as it shuts off. This allows a few seconds for the plastic to cool and therefore not stick to the housing.
Attaching the Coupling to Hose and Pump
Lay the hose on a flat and even surface with about 5 feet laying flat on the ground. Slide the clamps and hose onto the Female Camlock coupling supplied with the pump. Ensure the handles are level and perfectly horizontal and the hose seam is flat on the ground and also perfectly horizontal. Tighten the 2 hose clamps so the seam of the hose and the handles remain horizontal and both are secured in this position. When you attach the hose to the pump, ensure the handles are in the horizontal position.
Auxiliary Fuel Tank
Ensure that you push the female marine fitting all the way into the brass male fitting until it clicks — only then will it be held in place. The 3-way fuel valve will draw from either the on-board tank or the Auxiliary fuel tank; it cannot draw from both tanks at the same time. Point the handle of the valve so that it points to the fuel hose you wish to draw fuel from.
Pumping — Start-Up Procedures
Prior to starting the pump, ensure there are no twists or kinks in the hose. Once the pump is shut off there is a chance the hose may have twisted once there was no longer water moving through it — it is common for the hose to shift and move upon start-ups and shut-downs, so you must inspect the entire hose every time before you restart the pump.
Every time you start the engine you should walk along the hose its entire length as it fills, to ensure it does not move or shift and cause a twist in the hose. If a twist occurs that you cannot get out before it fully pressurizes, return immediately to the pump and shut down the motor to stop the hose from over-pressurizing and bursting.
Anchoring and Positioning the Hose
When using the optional Warthog Hose Hold-Down Kit: even a light breeze can flip over and twist the hose. To prevent the empty hose from being twisted and blown on windy days, secure the hose by inserting a peg on each side of the hose and sliding the bungee over the pegs and down tight to the ground. Insert pegs on an angle outwards to help the cord stay close to the ground. The bungee will stretch and allow the hose to take its shape without restricting the flow; once the pump is shut off to refuel or move it, the bungee will pull the hose back down to the ground and secure it there. Tie-downs should be used every 10 to 15 feet (3 to 5 meters).
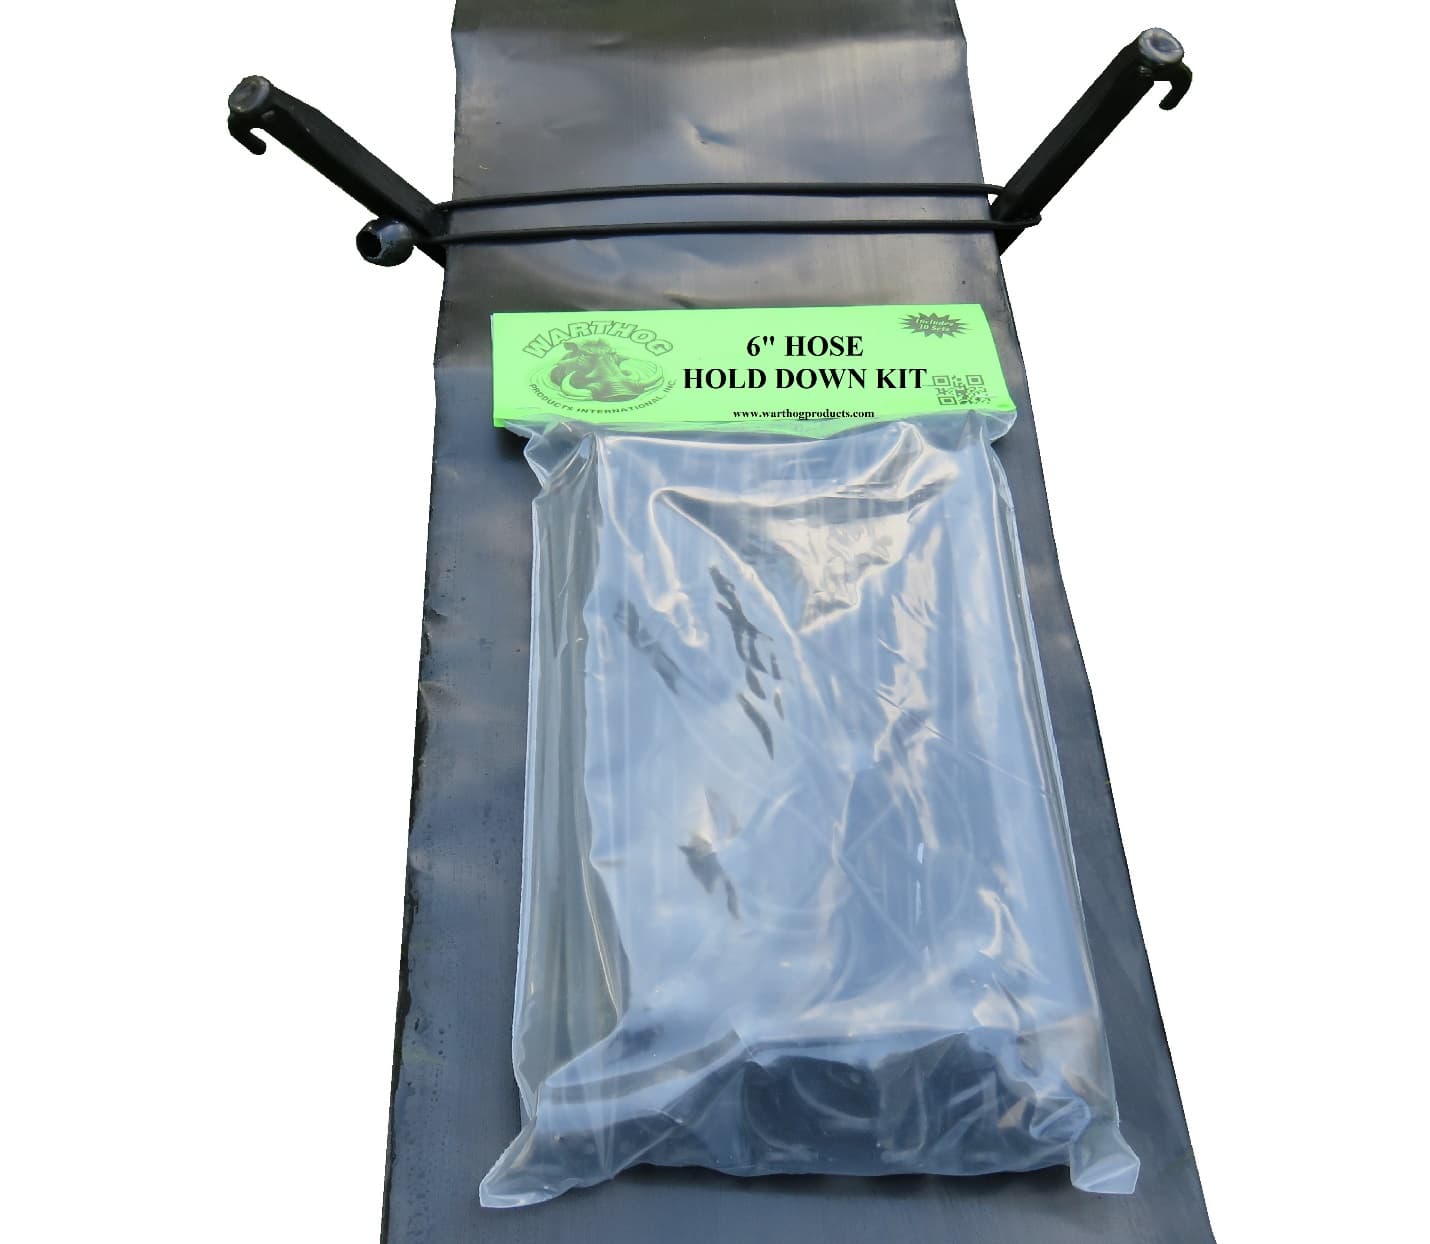
Warthog Hose Hold-Down Kit installed on the hose
The hose may want to roll down a side hill — insert pegs close to the hose on the lower side of the hill, as close together as required by the slope and/or terrain. Once the hose fills up it will roll until it rests against the pegs and is secured from further rolling. If and when the pump is shut off, check these areas well and ensure the hose has no twists and is laying flat. Walk along the hose upon restarting the pump to ensure it stays in place.
Securing the Pump
It is advised to tether the pump at all times by fastening a rope to the handle closest to the hose connection and fastening the other end to a stake or secure object. In the event that the hose gets yanked off or the coupling comes apart, the pump will act in the same manner as a jet boat and get away from you.
In the event of a side wind or waves, the WARTHOG PUMP may be secured by fastening a rope to the handle closest to the hose connection and fastening the other end to a stake or secure object, at as wide an angle to the hose as possible.
Maintenance
Engine — Refer to the engine operator’s manual for engine maintenance.
Gear Case — Check the gear case oil level every 24 hours and/or before every use. Change the oil in the gear case every 500 hours and also at the end of each season if storing the pump.
Storage of the Warthog Pump
When storing the Warthog Pump: drain the fuel tank, drain the carburetor fuel bowl, oil the carburetor linkage, and lube the cylinder head.
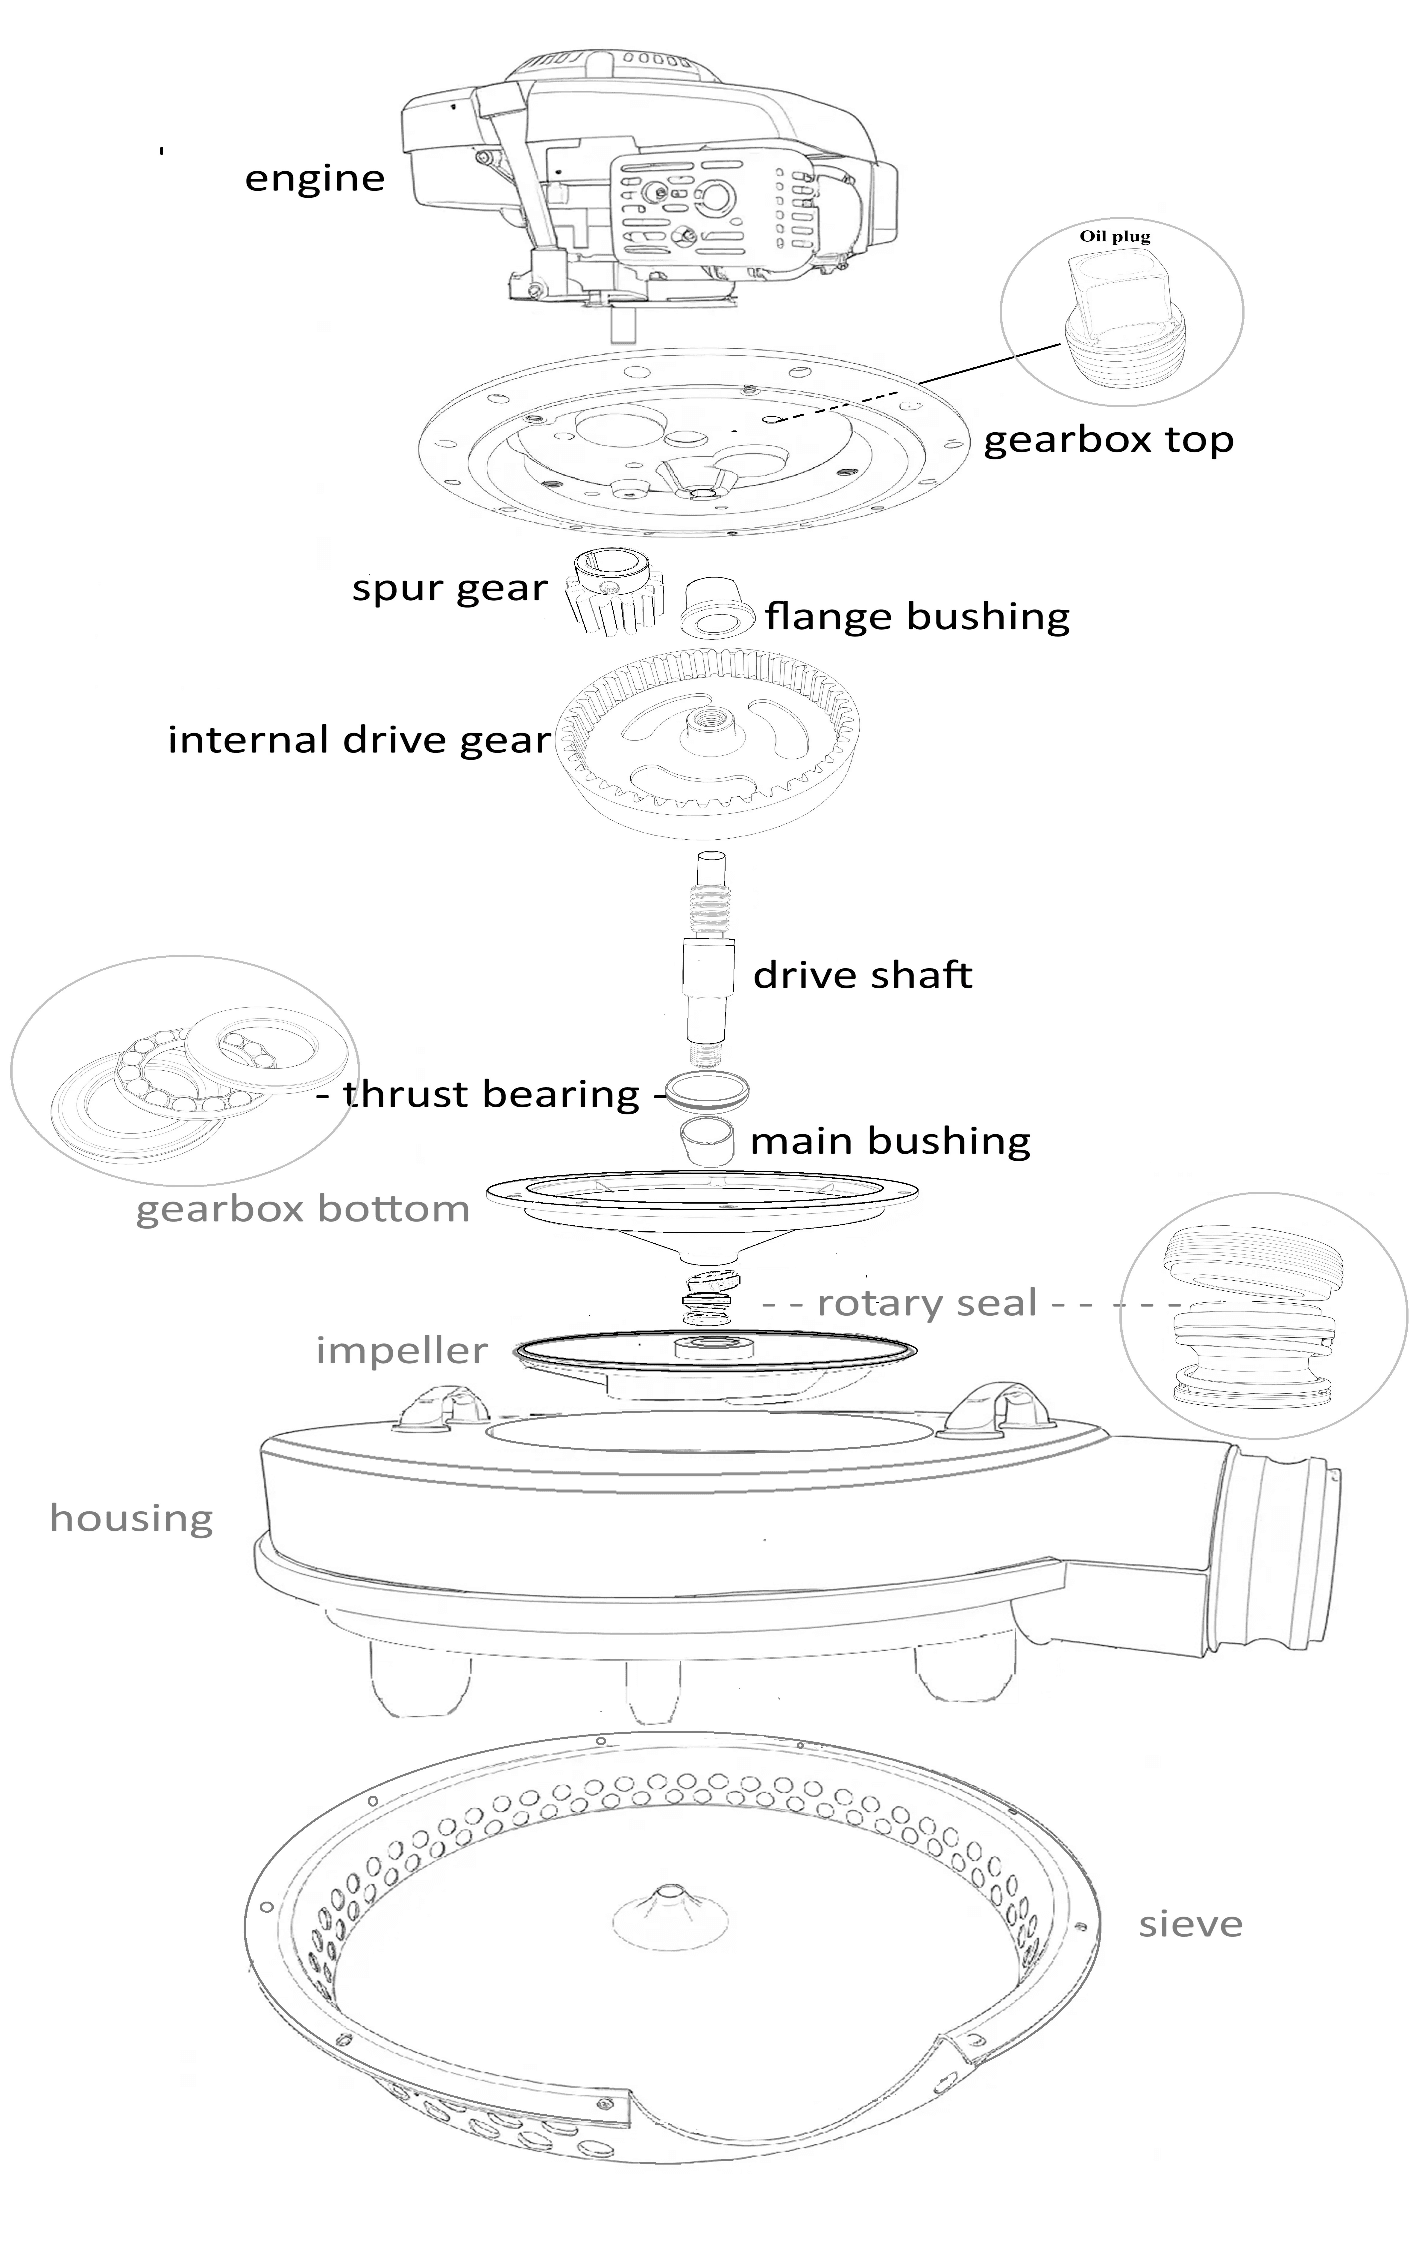
Pump Parts Diagram
An exploded view of the Warthog pump’s gearbox and housing assembly, for reference during maintenance and servicing.
Troubleshooting
| Problem | Cause | Solution |
|---|---|---|
Pump not level in water | Twisted hose | Ensure the hose is lying flat before connecting the camlock coupling |
Leaky hose | Holes or tears in hose | Repair with patching tape |
Hose bursting at pump | Too high of a lift | Use Warthog reinforced commercial hose |
Milky colored gear oil | Water seeping into gear case | Replace rotary seal |
Engine is difficult to start | Fouled spark plug | Replace or clean spark plug |
Engine is difficult to start | Old or poor fuel | Supply with new fuel, see engine owner's manual |